Monday, June 21, 2010

How to make a lined tote bag out of upholstery samples

I was given a bag of upholstery samples that would have otherwise been thrown out, and I immediately thought that the fabric would be perfect for a bag.

Materials:
-8 squares of upholstery fabric or another thick fabric(2 of the squares are for handles, so if you have something else you want to use for handles, you only need 6)
-another fabric for the lining
-sewing machine or needle and thread
-pins
-seam ripper

Directions:

1. First, sew 6 of your squares together to make a big 2 squares by 3 squares rectanle.


2. cut a peice of fabric the same size as the 3 squares by 2 squares rectangle, fold both of them the hamburger way, sew their sides together.


This is what my liner looks like rightside out:


Follow steps 3-4 for both the liner and the outside

3. pin gussets by folding a triangle where the height is the side seam and the bottom fold, and pin. Then sew.


This is what it will look like after sewing the gussets:

4. cut the triangles off, outside of the seam so it looks like this:

5. iron the folds on the outside bag where you want the bag to stand up so you have a more structured base.


6. put the outside bag inside the liner so all of the seams line up, right sides together. Pin the top edges together. Sew around the top, all the way around except for a 4 inch gap so you can turn the bag rightside out.

7. pull the outside fabric through the hole.


When you are done, the bag will look something like this:


8. put the liner inside the bag, and pin around the top


Now for the handles:

(If you have something other than upholstery fabric, like a tie or ribbon, to use as your handles you can skip steps 9-12),

*do steps 9-12 twice


9.Cut a square in half, and sew the long ends together
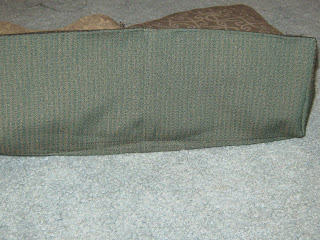


10. Fold the strip in half, and sew up the side without the fold.


11. Turn the strip inside out


12. Topstitch around the edge

Here is what my finnished handles looked like:


13. next, figure out where you want the handles and seam-rip the top seam where you want them


14. Stick the ends of the handles into the seam-ripped place and pin, so it is sandwitched between the liner and the outside fabric.


Here's what my bag looked like after pinning handles:


15. sew around the top of the bag.....


And you are done!

Saturday, June 19, 2010

card hat

It was crazy hat day at my little brother's school, so I recycled an incomplete deck of cards into a hat. It got tons of compliments, as it is over a foot tall!
It was very easy to make, I just made a ring of cards, slightly smaller on the top than the bottom, then continued stapling rings of cards on, using less cards for each row. It might have been cool to make a point, but unfortunately we ran out of cards.
Here is the little brother himself, posing in front of the rasberry bushes! Isn't he cute?

Monday, June 14, 2010

Summer is nearly upon us, and so I decided to make a skirt out of t-shirts (actually one of them is a pair of jersey knit pants.)

So here's what I did:

Materials:
-2 t-shirts
-1 piece of wide elastic
-Thread

Tools:
-pins
-scissors
-needle or sewing machine
Directions:
First, cut 2 large rectangles from each of your two t-shirts by cutting off the sleeves and collar and then cutting anything else you need to make the edges strait.


Basically, just sew the rectangles together, alternating in color.


So you have a big tube.


Then turn your head to the right because I was having some trouble uploading pictures to blogger, and sew the elastic to the skirt(I used the waistband from the pants I was using instead of one of the t-shirts). While you sew the elastic to the skirt, pull the elastic so that when you sew, the fabric will ruffle up.


Cut the skirt to the length you want it plus a little bit extra for the hem, hem it, and....
ta-da!


I'm not sure if I like the color combination enough to wear it out, but it is extremely soft and comfortable not to mention extremely easy to make, so I am definitely making it again.

Wednesday, June 9, 2010

Random green tip #12

Do not use disposable plastic water bottles. They are not only bad for the environment but unhealthy. And they are expensive.
For one thing, plastic water bottles are bad for the environment. There are several reasons why. Number 1: They are made of plastic. Plastic, the polymer that holds together the modern world and is made from oil. Plastic, the material that is also not very recyclable. In addition to the fact that only about 1% of plastic water bottles are actually recycled, when plastic is recycled, the recycled plastic objects are of worse quality, and usually can not be recycled again.
Number 2: Hardly any of them are recycled, and the caps can not be. See above.

Now, for how disposable water bottles are unhealthy: The plastic contains BPA which is very bad for human development. The BPA leaks out of the plastic into the water especially if the bottle gets warm or is used multiple times.

And the cost: I think this is sort of self explanatory.

However, never fear! Although most reusable plastic water bottles also contain BPA, there are a plethora of companies that make and sell metal watter bottles that come in a variety of prints and colors!